


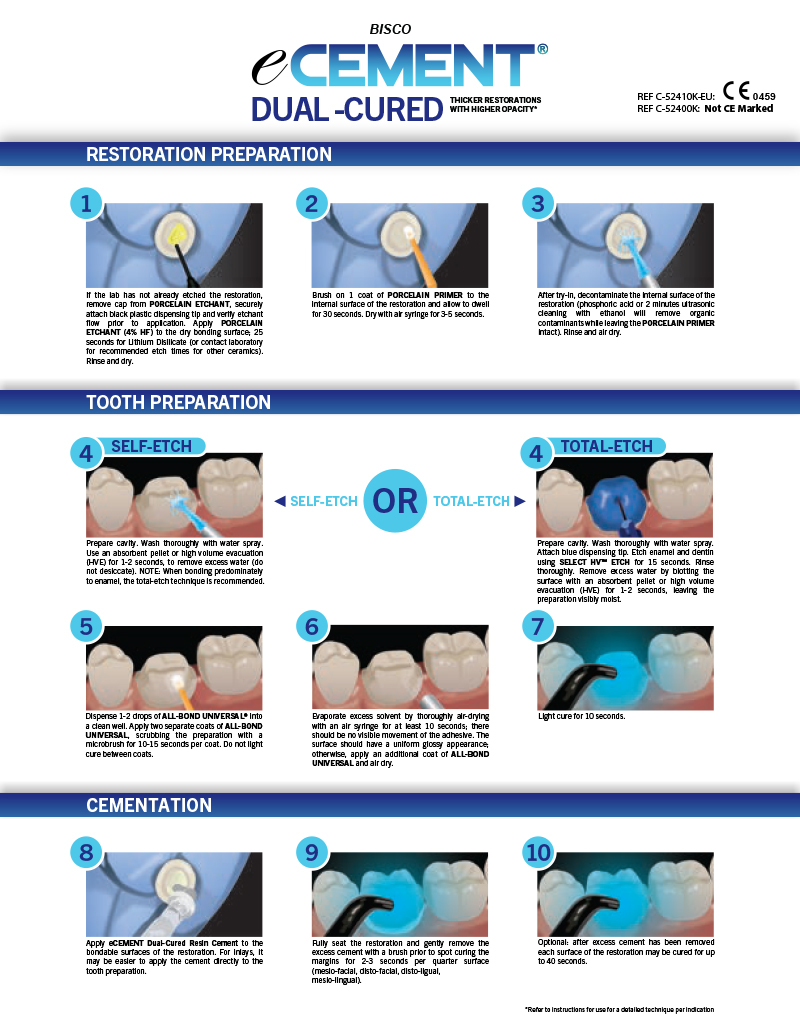
Description
Adhesive Cementation System for Lithium Disilicate Restorations
eCEMENT is a resin cementation system designed to simplify the placement of lithium disilicate (e.g. IPS e.max®*) restorations. Lithium disilicate is a silica-based glass ceramic available in pressed and milled forms, with both high and medium opacities, and high and low translucencies. The eCEMENT system contains both light-cure, and dual-cure resin cement, ensuring that all of your lithium disilicate restorations will have exceptional retention and esthetics. The eCEMENT system may also be used for cementation of all restorations including veneers, inlays, onlays, crowns, three-unit bridges CAD/CAM blocks & pressable ingots made of lithium disilicate.
The eCEMENT Adhesion Cementation System Kit can perform approximately 162 applications. The kit contains:
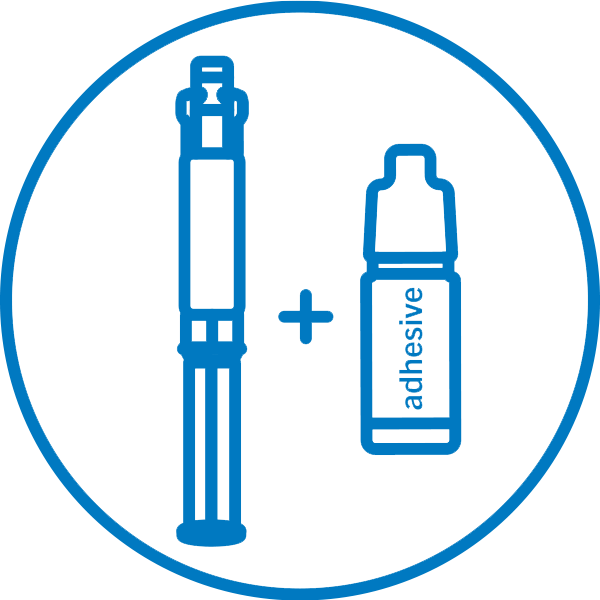
- eCEMENT DC (8g Dual-Syringe): eCEMENT DC is a dual-cured resin adhesive cement
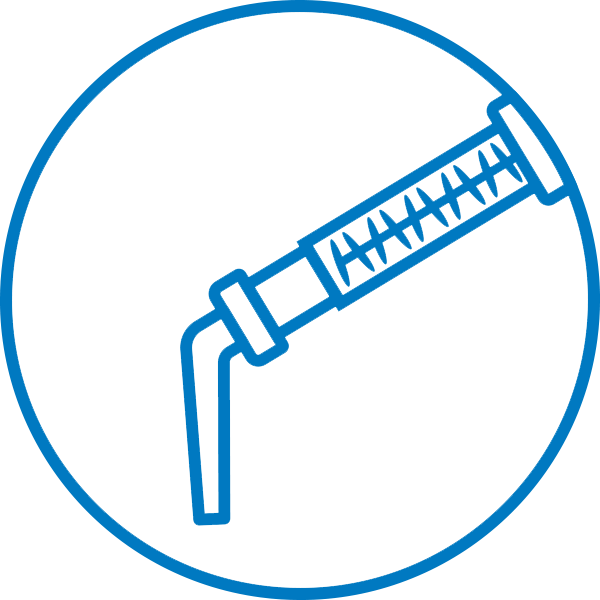
- eCEMENT LC (4.5g Syringe): eCEMENT LC is a light-cured adhesive resin cement
- Shades: Translucent; Milky Bright
- Select HV Etch w/BAC (5g Syringe): Select HV Etch w/BAC is formulated specifically for the selective etch technique. BISCO recommends using Select HV Etch w/BAC in this technique with All-Bond Universal
- All-Bond Universal (6ml Bottle): All-Bond Universal is a universal bonding agent that is compatible for use with all variations of resin materials (self-, dual-, and/or light-cure)
- Porcelain Primer (3ml Bottle): Porcelain Primer is a silane coupling agent used to improve the bond between porcelain/lithium disilicate restorations and resin cement
- 4% Porcelain Etchant (5g Syringe): Lithium disilicate restorations are completely etched after 25 seconds, regardless of the Hydrofluoric Acid content
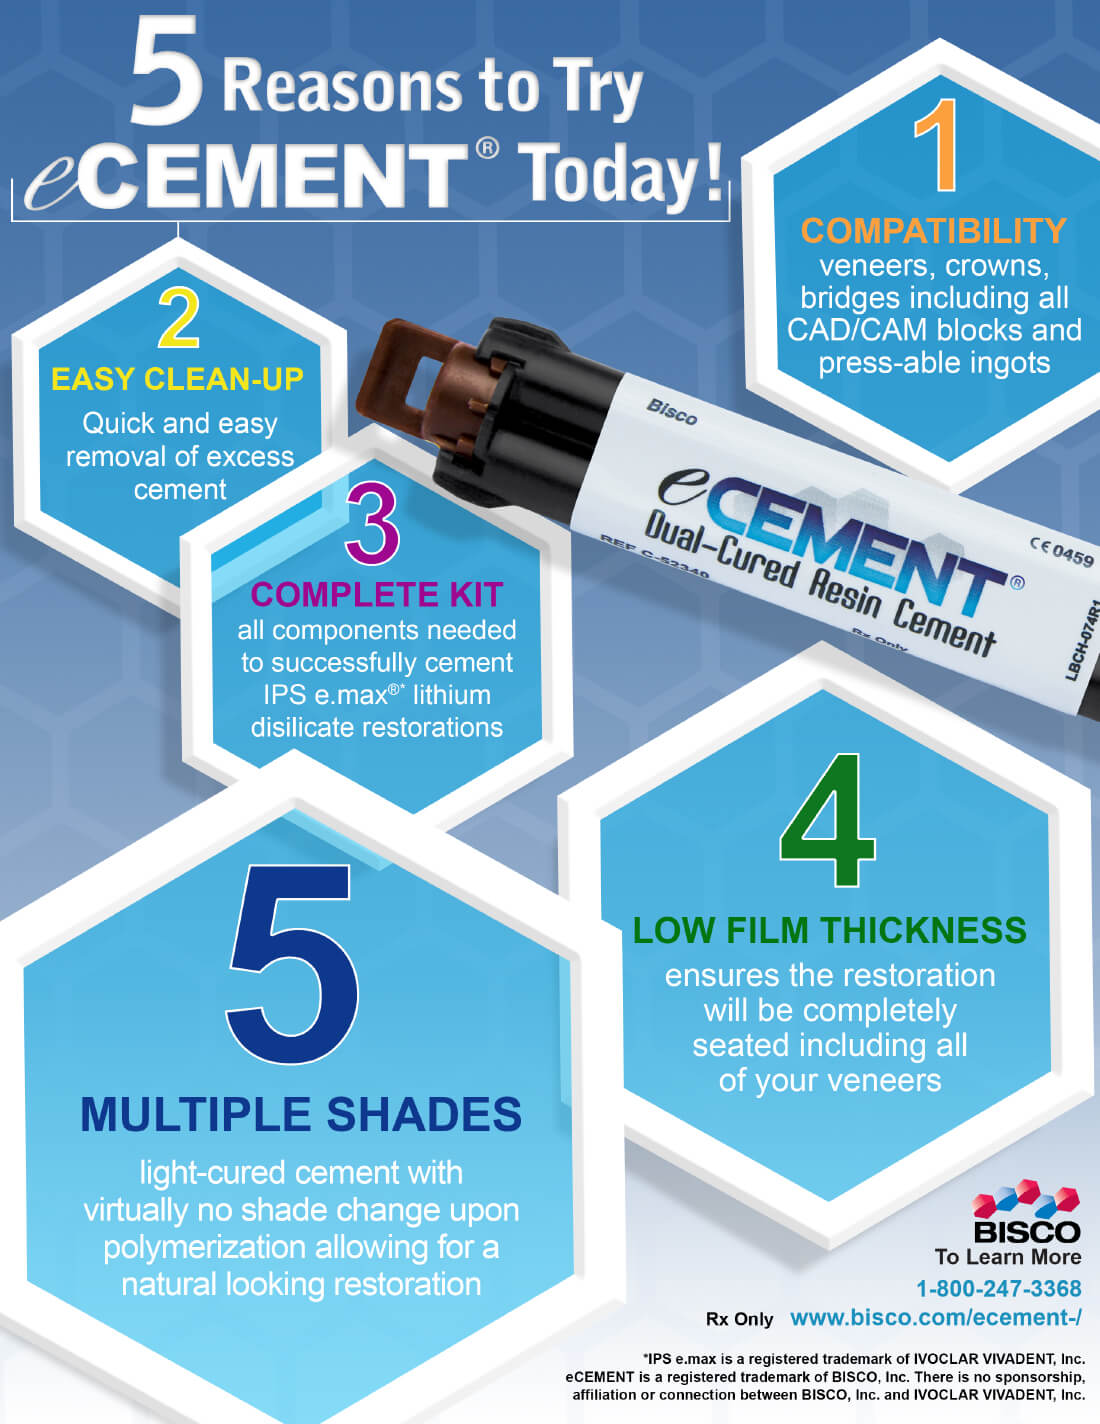
Unique Benefits:
- Easy removal of excess cement
- Low film thickness
- eCEMENT dual-cured: Radiopaque
Clinical Significance:
eCEMENT is a combination of innovative and proven products to successfully cement lithium disilicate restorations:
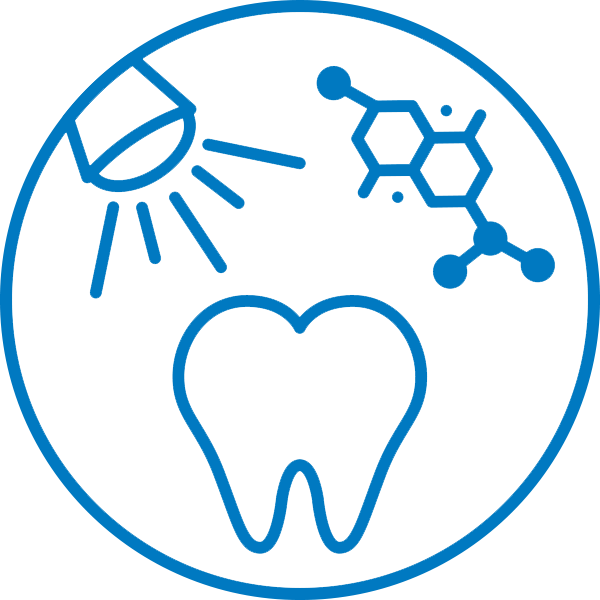
- eCEMENT light-cured cements flow within the milled cement spaces and are fully reactive at 2mm to the absorbing light energy
- eCEMENT dual-cured cement ensures polymerization where the light cannot reach
- Porcelain Primer is used to silanate the lithium disilicate (e.g. IPS e.max®*)
- All-Bond Universal creates a sealed surface to both dentin and enamel
- 4% Porcelain Etchant is used to treat the lithium disilicate
- Select HV Etch w/BAC is used to condition the tooth structure before bonding
In the box
- 1 Dual-Syringe eCEMENT Dual-Cured Resin Cement (8g)
- 1 Syringe eCEMENT Light-Cured Resin Cement Shade: Translucent (4.5g)
- 1 Syringe eCEMENT Light-Cured Resin Cement Shade: Milky Bright (4.5g)
- 1 Bottle All-Bond Universal (6ml)
- 1 Bottle Porcelain Primer (3ml)
- 1 Syringe 4% Porcelain Etchant (5g)
- 1 Syringe Select HV Etch w/BAC (5g)
- Accessories
- Instructions
Benefits
Radiopaque (eCEMENT Dual-Cured)
Radiopaque for easy detection on radiographs.
High Degree of Conversion (eCEMENT Dual-Cured)
A high degree of conversion ensures enhanced physical properties.
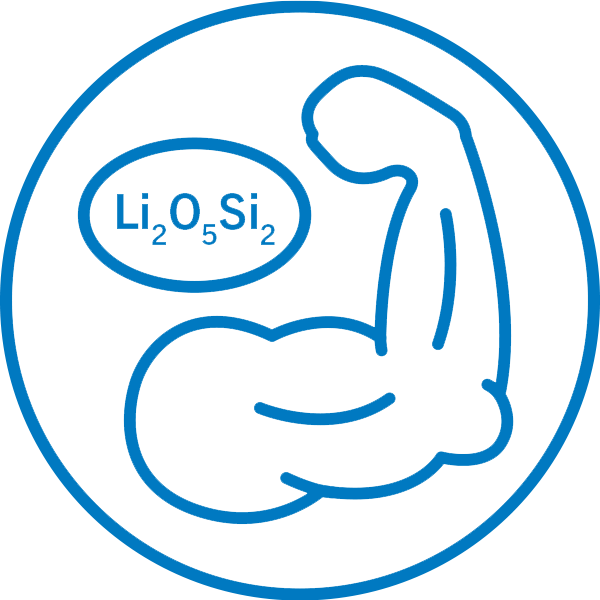
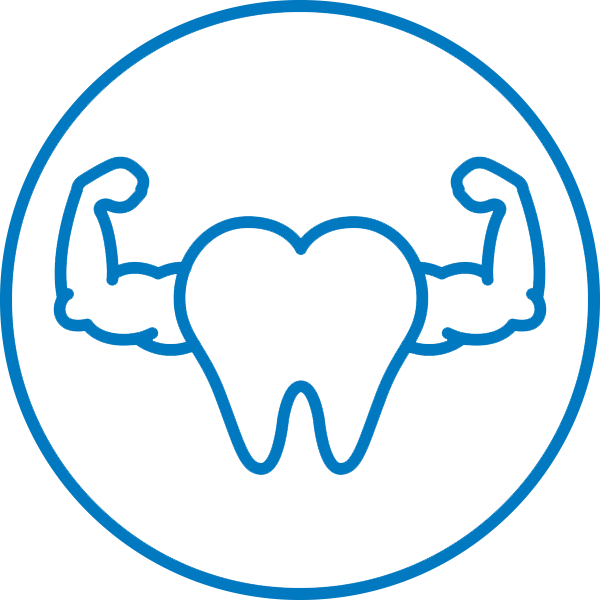
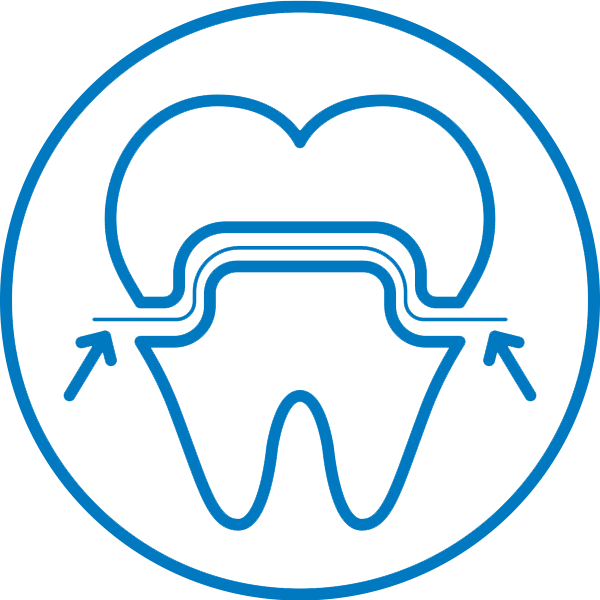
Strong Bond to Lithium Disilicate
Ideal for all e.max® restorations, delivering high shear bond strength.
Low Film Thickness
Low film thickness ensures the restoration is completely seated.
Adhesive Resin Cement
Adhesive resin cement, a bonding agent is required.
Auto-Mix (eCEMENT Dual-Cured)
Auto-mix, dual-syringe provides a consistent mix for immediate delivery.

Easy Clean up
Formulated to allow for quick and easy removal of excess cement.
Dual-Cured (eCEMENT Dual-Cured)
Dual-cured material.
Instructions
Brochure
SDS
eCEMENT Light Cured Cement SDS US English
EnglisheCEMENT Dual Cure Base SDS US English
EnglisheCEMENT Dual Cure Catalyst SDS US English
EnglisheCEMENT Water Soluble Try In Paste SDS US English
EnglisheCEMENT Light Cured Cement SDS INT English
EnglisheCEMENT Light Cured Cement SDS INT Albanian
AlbanianeCEMENT Light Cured Cement SDS INT Bulgarian
BulgarianeCEMENT Light Cured Cement SDS INT Croatian
CroatianeCEMENT Light Cured Cement SDS INT Czech
CzecheCEMENT Light Cured Cement SDS INT Danish
DanisheCEMENT Light Cured Cement SDS INT Dutch
DutcheCEMENT Light Cured Cement SDS INT Estonian
EstonianeCEMENT Light Cured Cement SDS INT Finnish
FinnisheCEMENT Light Cured Cement SDS INT French
FrencheCEMENT Light Cured Cement SDS INT German
GermaneCEMENT Light Cured Cement SDS INT Greek
GreekeCEMENT Light Cured Cement SDS INT Hungarian
HungarianeCEMENT Light Cured Cement SDS INT Icelandic
IcelandiceCEMENT Light Cured Cement SDS INT Italian
ItalianeCEMENT Light Cured Cement SDS INT Latvian
LatvianeCEMENT Light Cured Cement SDS INT Lithuanian
LithuanianeCEMENT Light Cured Cement SDS INT Macedonian
MacedonianeCEMENT Light Cured Cement SDS INT Norwegian
NorwegianeCEMENT Light Cured Cement SDS INT Polish
PolisheCEMENT Light Cured Cement SDS INT Portuguese
PortugueseeCEMENT Light Cured Cement SDS INT Romanian
RomanianeCEMENT Light Cured Cement SDS INT Russian
RussianeCEMENT Light Cured Cement SDS INT Slovak
SlovakeCEMENT Light Cured Cement SDS INT Slovenian
SlovenianeCEMENT Light Cured Cement SDS INT Spanish
SpanisheCEMENT Light Cured Cement SDS INT Turkish
TurkisheCEMENT Dual Cure Base SDS INT English
EnglisheCEMENT Dual Cure Base SDS INT Albanian
AlbanianeCEMENT Dual Cure Base SDS INT Bulgarian
BulgarianeCEMENT Dual Cure Base SDS INT Croatian
CroatianeCEMENT Dual Cure Base SDS INT Danish
DanisheCEMENT Dual Cure Base SDS INT Dutch
DutcheCEMENT Dual Cure Base SDS INT Estonian
EstonianeCEMENT Dual Cure Base SDS INT Finnish
FinnisheCEMENT Dual Cure Base SDS INT French
FrencheCEMENT Dual Cure Base SDS INT German
GermaneCEMENT Dual Cure Base SDS INT Greek
GreekeCEMENT Dual Cure Base SDS INT Hungarian
HungarianeCEMENT Dual Cure Base SDS INT Icelandic
IcelandiceCEMENT Dual Cure Base SDS INT Italian
ItalianeCEMENT Dual Cure Base SDS INT Latvian
LatvianeCEMENT Dual Cure Base SDS INT Lithuanian
LithuanianeCEMENT Dual Cure Base SDS INT Macedonian
MacedonianeCEMENT Dual Cure Base SDS INT Norwegian
NorwegianeCEMENT Dual Cure Base SDS INT Polish
PolisheCEMENT Dual Cure Base SDS INT Portuguese
PortugueseeCEMENT Dual Cure Base SDS INT Romanian
RomanianeCEMENT Dual Cure Base SDS INT Russian
RussianeCEMENT Dual Cure Base SDS INT Slovak
SlovakeCEMENT Dual Cure Base SDS INT Slovenian
SlovenianeCEMENT Dual Cure Base SDS INT Spanish
SpanisheCEMENT Dual Cure Base SDS INT Turkish
TurkisheCEMENT Dual Cure Catalyst SDS INT English
EnglisheCEMENT Dual Cure Catalyst SDS INT Albanian
AlbanianeCEMENT Dual Cure Catalyst SDS INT Bulgarian
BulgarianeCEMENT Dual Cure Catalyst SDS INT Croatian
CroatianeCEMENT Dual Cure Catalyst SDS INT Czech
CzecheCEMENT Dual Cure Catalyst SDS INT Danish
DanisheCEMENT Dual Cure Catalyst SDS INT Dutch
DutcheCEMENT Dual Cure Catalyst SDS INT Estonian
EstonianeCEMENT Dual Cure Catalyst SDS INT Finnish
FinnisheCEMENT Dual Cure Catalyst SDS INT French
FrencheCEMENT Dual Cure Catalyst SDS INT German
GermaneCEMENT Dual Cure Catalyst SDS INT Greek
GreekeCEMENT Dual Cure Catalyst SDS INT Hungarian
HungarianeCEMENT Dual Cure Catalyst SDS INT Icelandic
IcelandiceCEMENT Dual Cure Catalyst SDS INT Italian
ItalianeCEMENT Dual Cure Catalyst SDS INT Latvian
LatvianeCEMENT Dual Cure Catalyst SDS INT Lithuanian
LithuanianeCEMENT Dual Cure Catalyst SDS INT Macedonian
MacedonianeCEMENT Dual Cure Catalyst SDS INT Norwegian
NorwegianeCEMENT Dual Cure Catalyst SDS INT Polish
PolisheCEMENT Dual Cure Catalyst SDS INT Portuguese
PortugueseeCEMENT Dual Cure Catalyst SDS INT Romanian
RomanianeCEMENT Dual Cure Catalyst SDS INT Russian
RussianeCEMENT Dual Cure Catalyst SDS INT Slovak
SlovakeCEMENT Dual Cure Catalyst SDS INT Slovenian
SlovenianeCEMENT Dual Cure Catalyst SDS INT Spanish
SpanisheCEMENT Dual Cure Catalyst SDS INT Turkish
TurkisheCEMENT Water Soluble Try-In Paste SDS INT English
EnglisheCEMENT Water Soluble Try-In Paste SDS INT Albanian
AlbanianeCEMENT Water Soluble Try-In Paste SDS INT Bulgarian
BulgarianeCEMENT Water Soluble Try-In Paste SDS INT Croatian
CroatianeCEMENT Water Soluble Try-In Paste SDS INT Czech
CzecheCEMENT Water Soluble Try-In Paste SDS INT Danish
DanisheCEMENT Water Soluble Try-In Paste SDS INT Dutch
DutcheCEMENT Water Soluble Try-In Paste SDS INT Estonian
EstonianeCEMENT Water Soluble Try-In Paste SDS INT Finnish
FinnisheCEMENT Water Soluble Try-In Paste SDS INT French
FrencheCEMENT Water Soluble Try-In Paste SDS INT German
GermaneCEMENT Water Soluble Try-In Paste SDS INT Greek
GreekeCEMENT Water Soluble Try-In Paste SDS INT Hungarian
HungarianeCEMENT Water Soluble Try-In Paste SDS INT Icelandic
IcelandiceCEMENT Water Soluble Try-In Paste SDS INT Italian
ItalianeCEMENT Water Soluble Try-In Paste SDS INT Latvian
LatvianeCEMENT Water Soluble Try-In Paste SDS INT Lithuanian
LithuanianeCEMENT Water Soluble Try-In Paste SDS INT Macedonian
MacedonianeCEMENT Water Soluble Try-In Paste SDS INT Norwegian
NorwegianeCEMENT Water Soluble Try-In Paste SDS INT Polish
PolisheCEMENT Water Soluble Try-In Paste SDS INT Portuguese
PortugueseeCEMENT Water Soluble Try-In Paste SDS INT Romanian
RomanianeCEMENT Water Soluble Try-In Paste SDS INT Russian
RussianeCEMENT Water Soluble Try-In Paste SDS INT Slovak
SlovakeCEMENT Water Soluble Try-In Paste SDS INT Slovenian
SlovenianeCEMENT Water Soluble Try-In Paste SDS INT Spanish
SpanisheCEMENT Water Soluble Try-In Paste SDS INT Turkish
Turkish
All-Bond Universal ®
BISCO’s All-Bond Universal allows you to standardize clinical protocols for effective delivery of adhesion with a single-bottle.
All-Bond Universal ®
BISCO’s All-Bond Universal allows you to standardize clinical protocols for effective delivery of adhesion with a single-bottle.
All-Bond Universal ®
BISCO’s All-Bond Universal allows you to standardize clinical protocols for effective delivery of adhesion with a single-bottle.
All-Bond Universal ®
BISCO’s All-Bond Universal allows you to standardize clinical protocols for effective delivery of adhesion with a single-bottle.
All-Bond Universal ®
BISCO’s All-Bond Universal allows you to standardize clinical protocols for effective delivery of adhesion with a single-bottle.
All-Bond Universal ®
BISCO’s All-Bond Universal allows you to standardize clinical protocols for effective delivery of adhesion with a single-bottle.
All-Bond Universal ®
BISCO’s All-Bond Universal allows you to standardize clinical protocols for effective delivery of adhesion with a single-bottle.
What is the working time for eCEMENT DC?
The minimum working time of eCEMENT DC is 2 minutes, including mixing time.
What adhesive can I use with eCEMENT?
BISCO recommends using All-Bond Universal for bonding restorations with eCEMENT. eCEMENT LC can be used with any adhesive but some manufacturer's adhesives are not compatible with eCEMENT (DC). All BISCO adhesives are compatible with all self- & dual-cured cements. If you are using an adhesive from a different manufacturer, please refer to their instructions for use.
What is the difference between Duo-link Universal and eCEMENT (DC)? Can I use either to cement a lithium disilicate restoration?
Yes, both Duo-Link Universal & eCEMENT (DC) can be used to cement to lithium disilicate (e.max) restoration.
Do I need to pre-treat the surface of my Lithium Disilicate restorations?
Yes. Silane such as BISCO’s Porcelain Primer or Bis-Silane should be used to prime the internal surface of the lithium disilicate restoration.
How many shade options are available in the eCEMENT kit?
eCEMENT LC is available in three shades, A1, Translucent and Milky Bright. eCEMENT DC is available in one shade: Universal.
What is the shelf life of eCEMENT?
2 years.
What is the best way to clean up eCEMENT?
To aid in the removal of excess cement, tack cure the margins for 2-3 seconds and remove excess cement prior to final curing.
Can I use eCEMENT (DC) to bond to lithium disilicate restorations?
Yes, BISCO indicates eCEMENT (DC) to cement lithium disilicate restorations.
