



Key Takeaways
- Most cementation failures are protocol problems, not cement problems — surface prep is where the bond is won or lost, regardless of which substrate you’re working with.
- Not all substrates respond to the same chemistry: zirconia has no silica, so hydrofluoric acid etching does nothing — it needs airborne-particle abrasion and an MDP-containing primer. E.max, by contrast, responds well to the etch-and-silane protocol that has decades of evidence behind it.
- Metal requires sandblasting plus an MDP-containing primer; 3D-printed resin requires manufacturer-specific primer selection and meticulous surface cleaning. In all four cases, skipping surface prep is where long-term failures begin.
Want to go deeper on mechanical retention? Hear Dr. Rolando Nuñez break it all down on the Bonding & Beer podcast
When an indirect restoration fails, the blame usually lands on the cement. It’s an easy conclusion to reach — the crown came off, the cement is what holds it on, so the cement must be the problem. But that logic skips the step that actually determines whether the bond survives: what happened to the surface before the cement ever touched it.
At BISCO, 45 years of work in adhesion science has made one thing abundantly clear: cementation failures are almost always a surface prep problem, not a cement problem. The cement can only do what the surface allows it to do. And different substrates — zirconia, e.max, metal, and 3D-printed resin — each require their own preparation logic.
By the end of this article, you’ll understand exactly how to approach mechanical retention for each of these primary indirect materials, why the protocols differ, and what goes wrong when they’re skipped or shortchanged.
Why Mechanical Retention Matters (And Why It’s Not the Same for Every Material)
The Difference Between Mechanical and Chemical Interaction
Mechanical retention refers to the physical interlocking between a cement and a surface — the micro-roughness that gives the cement somewhere to grab. Chemical interaction, on the other hand, involves a molecular bond between the cement and the substrate, often facilitated by a coupling agent like silane or an MDP-containing primer.
These two mechanisms aren’t mutually exclusive, and for most substrates you want both working together. But the balance shifts depending on what the restoration is made of. Some materials respond well to chemical bonding; others rely more heavily on the mechanical side. Getting that distinction wrong is where most cementation failures originate.
Why Getting This Wrong Is Usually a Surface Prep Problem, Not a Cement Problem
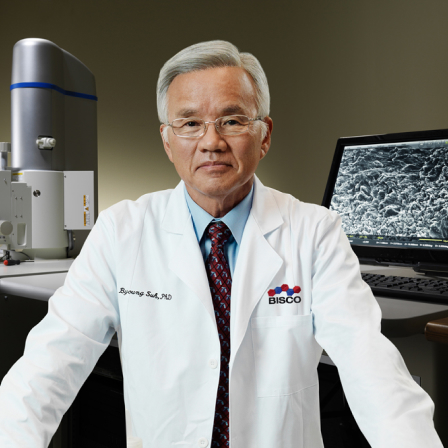
Dr. Rolando Nuñez, Clinical Marketing Manager at BISCO, puts it plainly: “When it comes to debonding, there is usually a failure in the cementation protocol. Most of the time, it’s a protocol problem rather than a cement problem.”
That framing matters. If you reach for a different cement every time a restoration fails, you’re solving the wrong problem. The question to ask first is always: was the surface properly prepared?
How Substrate Choice Should Drive Your Bonding Protocol
The clinical habit of defaulting to one bonding protocol for all indirect restorations is understandable — it’s efficient and familiar. But it creates risk. Zirconia, e.max, metal, and 3D-printed resin each have different surface chemistries, different porosities, and different responses to mechanical and chemical preparation. The protocol should follow the material, not the other way around.
Zirconia: Mechanical Retention on a Substrate That Plays by Its Own Rules
Why Traditional Etching Doesn’t Work on Zirconia
Hydrofluoric acid etching works on glass-based ceramics because it selectively dissolves the glassy phase of the material, leaving a roughened surface that creates micromechanical retention. Zirconia doesn’t have a glassy phase. It contains no silica, so hydrofluoric acid has nothing to react with — the surface stays smooth, and you lose the retention you were counting on.
As Dr. Nuñez explains: “Zirconia does not contain any silica; hence, hydrofluoric acid will not create any mechanical retention. Mechanical retention is roughening the surface either by chemical means (hydrofluoric acid) or physical means (sandblasting).” With zirconia, sandblasting is how you get there.
How to Mechanically Prep a Zirconia Surface Before Cementation
Airborne-particle abrasion with 50 μm (micrometers) aluminum oxide particles is the standard approach for creating surface roughness on zirconia. The goal is controlled micro-roughening — enough texture for the cement to interlock mechanically, without compromising the structural integrity of the restoration.
After sandblasting, clean the surface thoroughly before applying any primer. Contamination at this stage — saliva, blood, debris — can undermine everything that follows.
Choosing the Right Cement for Zirconia
Because silane doesn’t bond to zirconia (no silica, nothing for silane to react with), you need an MDP-containing primer to establish the chemical component of your bond. MDP (10-methacryloyloxydecyl dihydrogen phosphate) has a phosphate group that bonds chemically to the metal oxide surface of zirconia.
Products like Z-Prime Plus are formulated specifically for this purpose — to bridge the gap between the zirconia surface and a resin cement. Pair that with a resin cement that also contains MDP, and you have both chemical and mechanical retention working together. Conventional glass ionomer cements don’t offer the same adhesion to zirconia and are generally not the right choice here.
E.max (Lithium Disilicate): Mechanical Retention Meets Adhesive Chemistry
Why e.max Responds Well to Hydrofluoric Acid Etching
Lithium disilicate is a glass ceramic — meaning it does contain silica. That makes it an ideal candidate for the etch-and-silane protocol that has been the standard in adhesive dentistry for decades.
Etching with hydrofluoric acid creates microporosity on the e.max surface by selectively dissolving the glassy matrix around the lithium disilicate crystals. That roughened surface gives the silane coupling agent something to chemically react with. As Dr. Nuñez notes: “e.max’s ability to be easily etched and silanized provides a very predictable and convenient protocol to predictably cement the restorations. Hydrofluoric acid creates mechanical retention, and silane will bond to the silica contained in the material. This technique has been proven over many decades of research.”
The result is a bond that combines mechanical interlocking from the etched surface with a chemical link from the silane. Compared to zirconia, the protocol is more forgiving — and more reliably strong.
When to Use Resin Cement vs. Conventional Cement for e.max
For adhesively bonded e.max — veneers, thin overlays, minimally prepped restorations — resin cement after full etch-and-silane preparation is the standard approach. For full-coverage crowns with adequate resistance and retention form, a resin-modified glass ionomer can be appropriate, though many clinicians still prefer resin cement for the superior bond strength.
The key decision point is how much the restoration relies on the adhesive bond vs. the physical shape of the prep. A full-coverage crown on a prep with adequate wall height and near-parallel walls has natural resistance to displacement – the cement is doing more sealing than holding, so your options are more flexible. A veneer or minimally prepped overlay doesn’t have that structural advantage, which means the adhesive bond has to compensate. In those cases, the full etch-and-silane protocol and a resin cement aren’t optional.
Metal Restorations: Old School, Mechanical Retention Still Matters
Surface Prep for Metal: Sandblasting and Metal Primers
Metal restorations are less common than they used to be, but they’re still placed regularly, and the bonding protocol is specific. Sandblasting the inner surface creates the micro-roughness needed for mechanical retention — a properly prepped metal surface should look uniformly matte, not shiny.
After sandblasting, an MDP-containing metal primer is applied to establish the chemical bond. Dr. Nuñez describes it this way: “The surface of metal looks matte after sandblasting. Ready to take the MDP-containing material to achieve the chemical bond.” That primer step is what upgrades the bond from purely mechanical to genuinely adhesive.
Why Mechanical Retention Is Especially Important for Metal Restorations
Metal doesn’t etch the way glass ceramics do, and there’s no silane option. That means the physical surface prep is doing the heavy lifting. Skipping it has real consequences: “Skipping sandblasting can have an impact on the final shear bond strength to the metal substrate,” Dr. Nuñez notes. A lower bond strength isn’t always immediately obvious, but it shows up in the long run as debonding under occlusal load.
Cement Selection for Metal Crowns and Bridges
Resin cements with MDP offer the best adhesion to primed metal surfaces. Resin-modified glass ionomer is also used frequently for metal restorations, particularly when fluoride release is a consideration or when the preparation geometry provides adequate retention on its own. Traditional zinc phosphate cement is still used, though it offers no chemical adhesion — it relies entirely on mechanical locking and preparation geometry.
3D-Printed Resin: The New Kid Needing a Different Mechanical Retention Playbook
Why the Surface of 3D-Printed Resin Requires Special Attention Before Bonding
3D-printed resin restorations are gaining ground quickly, and the material science is evolving just as fast. One of the challenges this creates is that the surface properties of printed resins can vary significantly between manufacturers and even between different versions of the same product line.
What many printed resins have in common is an oxygen-inhibited layer on the surface — a thin zone of incompletely polymerized resin that can interfere with bonding if it’s not addressed. Thorough cleaning and appropriate surface treatment are essential before cementation.
Surface Treatment Protocols for 3D-Printed Resin
Dr. Nuñez notes that bonding to 3D-printed resin follows a similar logic to other substrates: “It is just a matter of selecting the proper primer — silane, or adhesive.” That said, getting the right primer selection requires knowing what’s in the material. Some printed resins respond well to silane; others require a methacrylate-compatible adhesive. The manufacturer’s instructions for use are your first stop.
Light sandblasting is often recommended to increase surface area and remove the inhibited layer before applying primer. Clean thoroughly after abrasion and before any priming step. Given how rapidly this material category is evolving, checking current literature and the specific IFU for your printed resin of choice is more important here than for any other substrate.
What the Research Is (and Isn’t) Saying Yet About Long-Term Performance
The long-term clinical data on 3D-printed resin restorations is still accumulating. Existing studies are promising, but the evidence base isn’t as deep as it is for zirconia, e.max, or even metal. That’s not a reason to avoid the material — it’s a reason to be meticulous about the protocol and to stay current as the literature develops. The dentists who will see the best outcomes with printed resins are the ones who treat the IFU as mandatory reading, not optional fine print.
Know Your Substrate, Know Your Protocol
Every substrate covered here requires preparation before cementation. The details differ, but the principle doesn’t: never skip surface prep, and always match your primer and cement to the material you’re working with. Here’s a quick-reference summary:
|
Substrate |
Surface Prep |
Primer/Agent |
Best Cement Choice |
|
Zirconia |
Airborne-particle abrasion (μm alumina) |
MDP-containing primer (e.g., Z-Prime Plus) |
Resin cement with MDP monomer |
|
E.max (Lithium Disilicate) |
Hydrofluoric acid etch, then silane |
Silane coupling agent |
Resin cement (adhesive or self-adhesive) |
|
Metal |
Airborne-particle abrasion, degrease |
Metal primer (MDP-containing) |
Resin-modified glass ionomer or resin cement |
|
3D Printed Resin |
Light surface abrasion, clean thoroughly |
Silane or adhesive per manufacturer |
Resin cement per IFU |
One line from Dr. Nuñez that’s worth posting above your operatory: “Never skip it.” That applies across all four substrates. The prep takes minutes; the debonding takes a second appointment and a frustrated patient.
The Bottom Line
The material landscape for indirect restorations has never been more varied — which means the expectation that one bonding protocol covers everything has never been more dangerous. Zirconia, e.max, metal, and 3D-printed resin each respond to different preparation strategies, and the cement you select can only perform as well as the surface underneath it allows.
Surface prep isn’t a glamorous part of the workflow. But it’s the part that determines whether the restoration is still there in ten years. Know your substrate, commit to the protocol, and don’t skip the steps that look optional but aren’t.
Want to go deeper on mechanical retention? Hear Dr. Rolando Nuñez break it all down on the Bonding & Beer podcast.